Site Center
Create Site
Entry: In the left navigation bar, select "Site" to enter the Site Center page, then click the "+ Create Site" button in the upper-right corner.

Step 1: Add Gateway
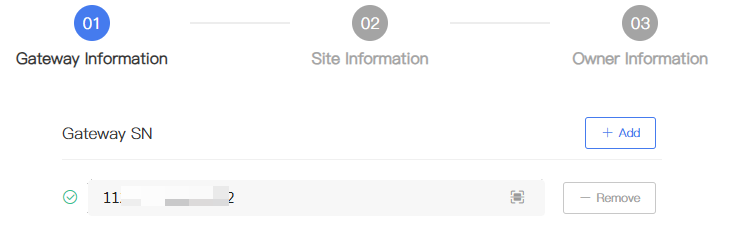
Bind a Gateway to the current Site to establish a data connection:
Enter Gateway: Enter the Gateway serial number in the Gateway SN input field.
Click "Add" to add multiple Gateways at once.
If an entry is incorrect, click "Remove" in the row of the corresponding Gateway to clear it.
After binding is complete, click "Next".
Step 2: Fill in Site Information
On the "Site Information" page, fill in the basic operating parameters of the Site. After confirming that all entries are correct, click "Next":
| Field Name | Instructions |
|---|---|
| Site Name | Enter the Site name. It is recommended to use a unique, easily identifiable name. |
| Site Region | Select the region where the Site is located. After selecting the region, the system automatically matches the default time zone, currency unit, and benchmark electricity price. |
| Address | Enter the detailed address of the Site. It is recommended to enter the actual installation address. |
| Time Zone | Select the time zone where the Site is located. Automatically selected by the system after filling in the region; can be manually modified. |
| Site Type | Select the Site type based on the actual project type. Options include: Residential PV, Residential PV + Storage, Commercial & Industrial PV, Commercial & Industrial Storage, Utility-Scale PV, Utility-Scale Storage. > For Site type descriptions, see 3.2 Site Type Descriptions. |
| On-Gride | Select the grid connection type based on the Site access method. It is recommended to select the corresponding grid connection type based on the selected Site type. |
| Currency Unit | Select the currency unit for Revenue statistics. Automatically filled by the system after filling in the region; can be manually modified. |
| Temperature Unit | Select the temperature display unit, typically ℃ or ℉. |
| Capacity | Enter the total installed capacity of the Site. |
| Tariff per kWh | Enter the local benchmark electricity price. Automatically filled by the system after filling in the region; can be manually modified. |
| Fuel per kWh | Enter the fuel consumption per unit of power generation. Applicable to diesel generator-related scenarios. |
| Details | Enter supplementary notes. Supports up to 600 characters. |
Step 3: Assign Owner
On the "Set Owner" page, you can bind an Owner account to the current Site. Depending on the actual situation, choose one of the following three methods to bind an Owner account to the Site:
[figure: Assign Owner to Site]
Option A: Register a new Owner account
If the Owner has not yet registered an account on the platform:
Fill in the following information as prompted:
Owner Email/Mobile Phone: Enter the Owner's email or mobile phone number.
Owner's Operator: Select the Owner's operator from the drop-down list.
Set Password:
Select "Auto-generate": The system automatically generates a temporary password and sends it to the Owner's email/mobile phone number you entered.
Select "Custom": Manually set a login password for the Owner.
Click "Complete". The system creates the new Owner account and completes the Site binding at the same time.
Option B: Associate an existing account
If the Owner already has a registered account on the platform:
Click "Set Owner".
In the "Set Owner" dialog box that appears, select the corresponding Owner.
Click "OK" to complete the binding.
[figure: Bind Existing Account]
[figure: Select User]
Option C: Associate later
If the Site does not need to be transferred to an end user at this time:
Select the "Associate Later" radio button.
Click "Complete". The system directly creates the Site and returns to the list.
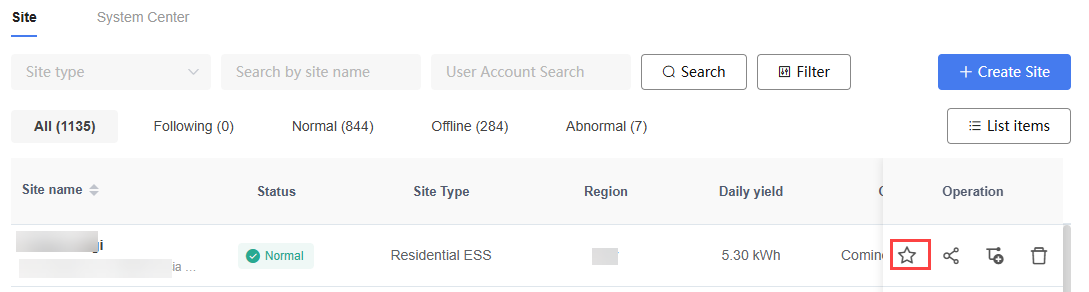
Follow Site
Click the follow icon on the Site list. The Site appears at the top of the list and in the followed list.
Share Site
You can share a Site with other users. The recipient does not need to log in to MatriCloud to view Site information via the shared link.
Steps:
- In the Site list, locate the target Site and click the "Share" icon in the operation column.
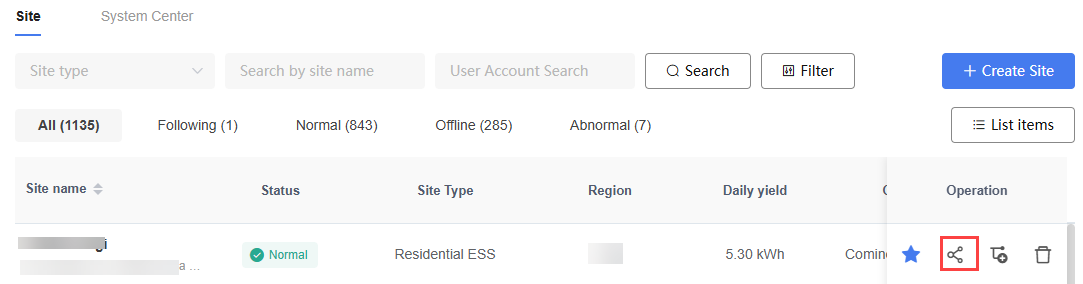
Click "Add Share" in the pop-up window, select the sharing validity period: 1 Day, 7 Days, 30 Days, or Permanent.
After the system generates the sharing link, click the "Copy" icon and send the link to the target user.
Distribution Site
Use the Assign Site function to bind a Site to a specified Owner account.
- In the Site list, locate the target Site and click the "Distribution" icon in the operation column.
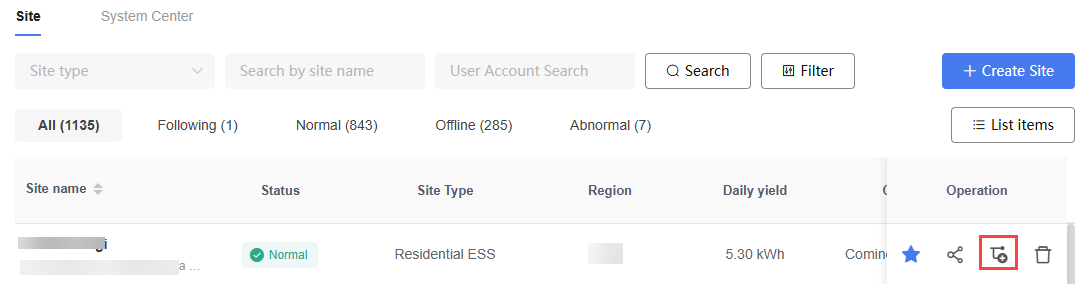
On the "Set Owner" page, choose one of the following methods:
"New Account": Create a new Owner account. Enter the email, operator, region, and set the password.
"Existing Account": Select the Owner to be assigned from the user list, then click "Confirm".
Delete Site
Delete a Site that is no longer needed.
Steps:
- In the Site list, locate the target Site and click the "Delete" icon in the operation column.
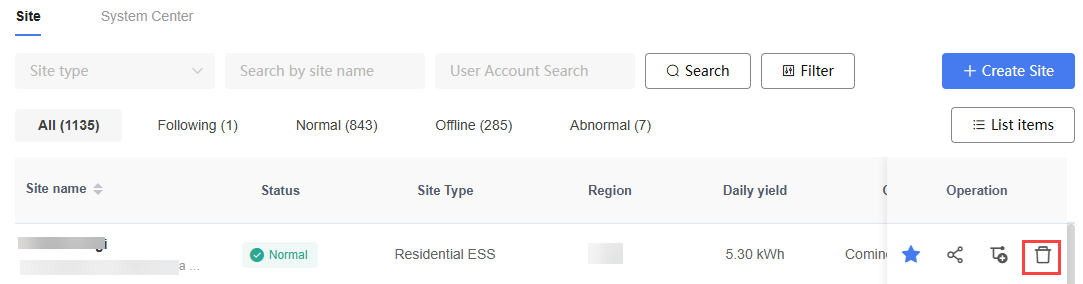
In the confirmation dialog box that appears, click "Confirm".
The Site is removed from the Site list.
TIP
After deleting a Site, all Site-related data is permanently deleted and cannot be recovered.
If the Site has a bound Gateway, unbind the Gateway before deleting the Site.