Gateway
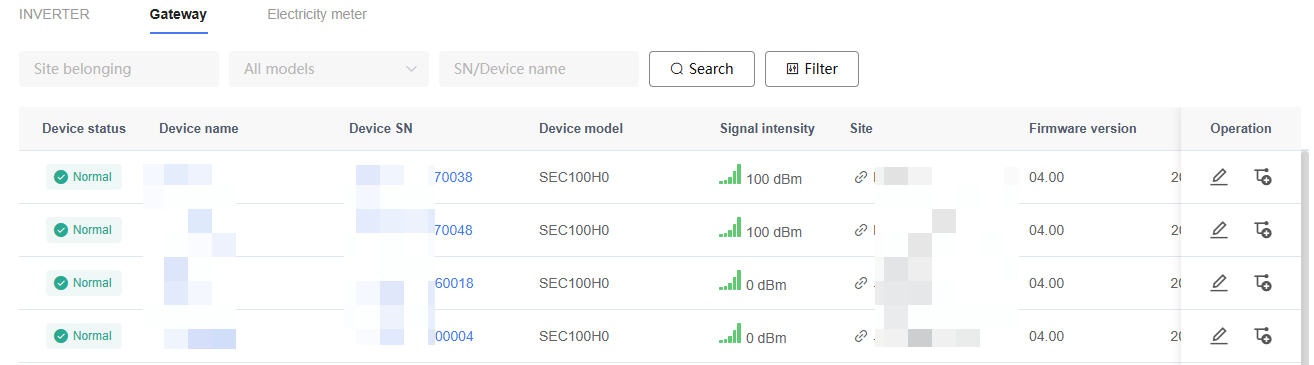
On the "Device" page, click the "Gateway" tab to view Gateway Devices connected to the platform.
Gateway List
The Gateway list displays information including Device status, Device name, Device serial number (SN), Device model, signal strength, affiliated Site, Firmware version, and update time.
Users can perform the following operations:
Search or filter Gateways by Site, Gateway model or SN, Device status, model, or region.
View Gateway operating status and signal strength, and view the affiliated Site and Firmware version information of the Gateway.
Enter the Gateway Details page to view detailed Device information.
Rename a Gateway.
Assign a Gateway to a Site.
NOTE
Signal strength is used to reflect the current network connection quality of the Gateway.
The information displayed may vary depending on the Gateway model.
Only users with the corresponding permissions can perform Firmware Upgrade operations.
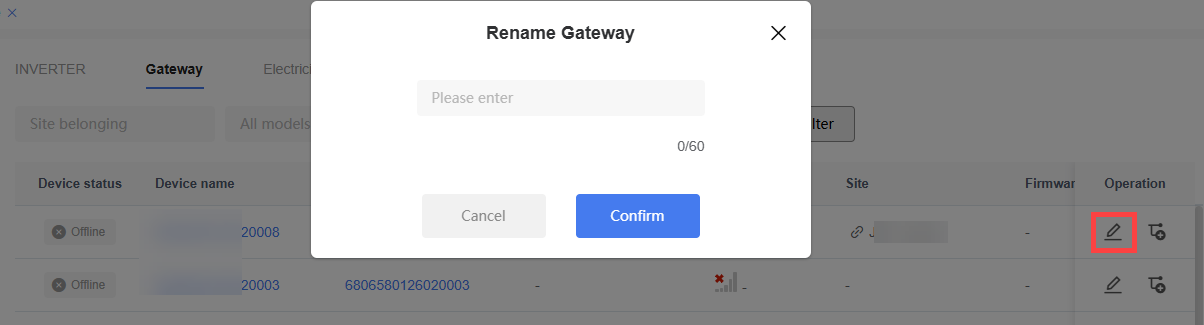
Rename Gateway
Steps:
Locate the target Gateway in the Gateway list.
Click the "Edit" icon in the operation column.
Enter the new Gateway name.
Click "Confirm" to save the change.
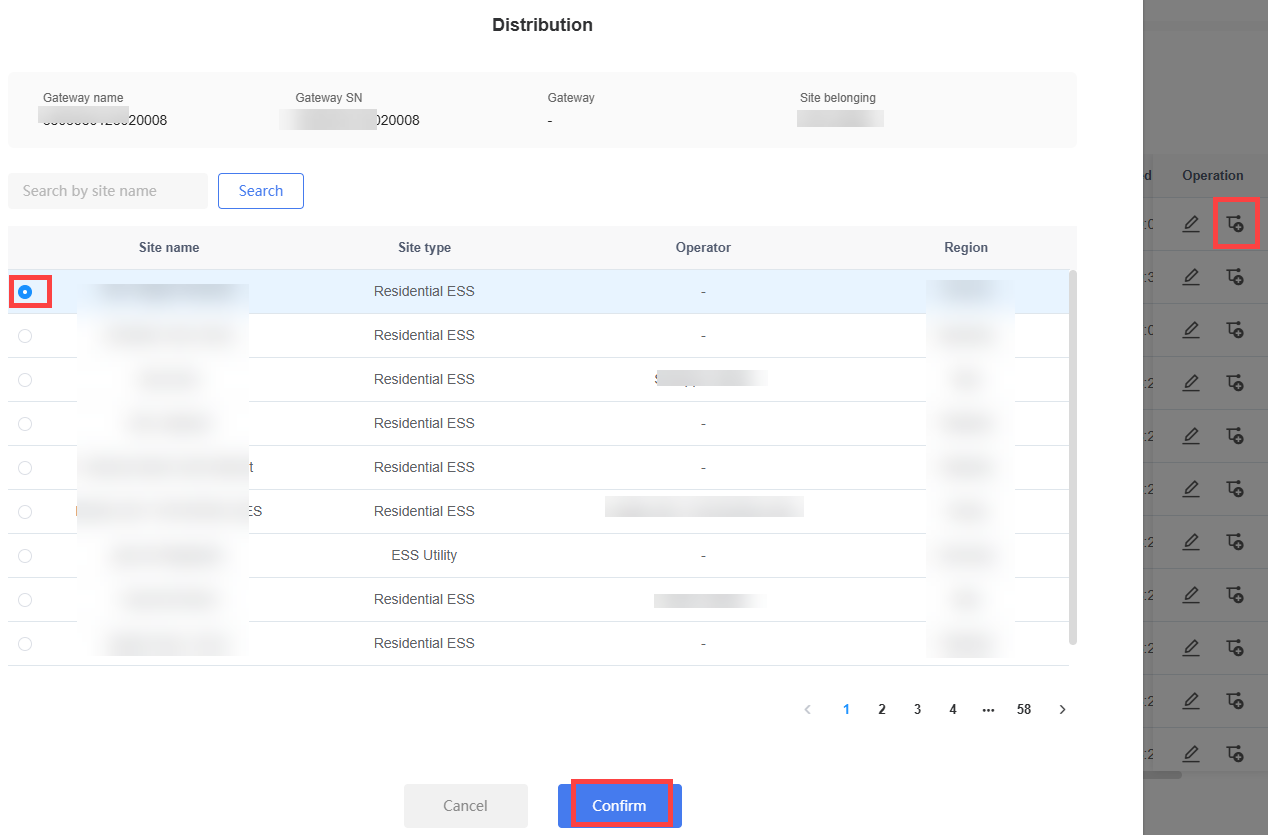
Assign Gateway
Steps:
Locate the target Gateway in the Gateway list.
Click the "Assign" icon in the operation column.
Select the target Site.
Click "Confirm" to complete the assignment.
NOTE
The Gateway name is used for platform display only and does not affect Device communication.
A Gateway can only be associated with one Site.
After assignment is complete, the data collected by the Gateway belongs to the corresponding Site.
The information displayed may vary depending on the Gateway model.
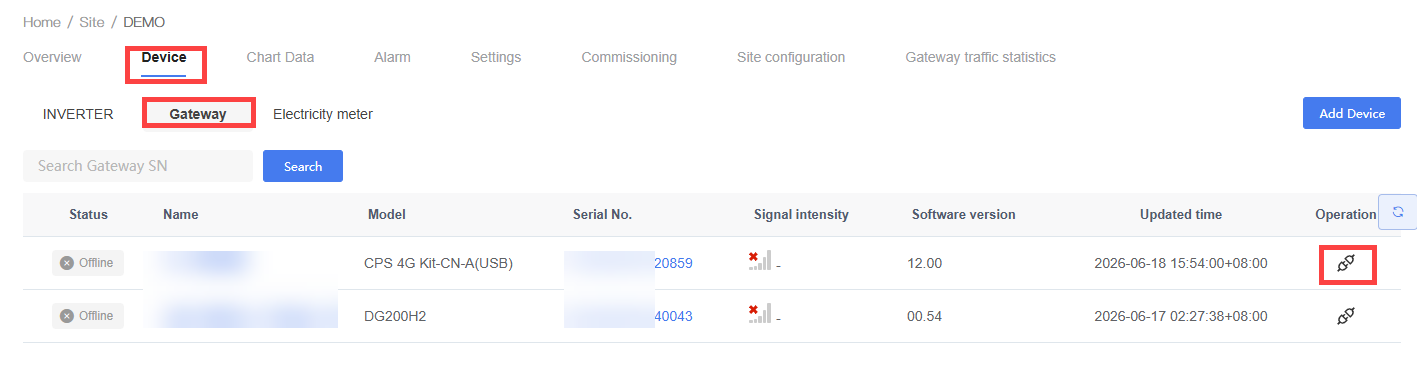
Unbind Gateway
Steps:
Enter the target Site Details page.
Click the "Device" tab.
Select "Gateway".
Locate the Gateway to be unbound.
Click the "Unbind" icon in the operation column.
Confirm the unbinding operation.
NOTE
The Site Details page can be accessed from the Site list or by clicking the Site link in the Gateway list.
After unbinding, the Gateway is no longer associated with the current Site.
After unbinding, the Gateway and all Devices under it are removed from the Site.
The unbinding operation does not delete the Gateway Device itself.
An unbound Gateway can be reassigned to another Site.
Overview
The "Overview" tab is used to view basic Gateway information, operating status, network connection status, and connected Device information. On this page, users can view information including Device information, communication status, Firmware version, and the list of connected Devices.
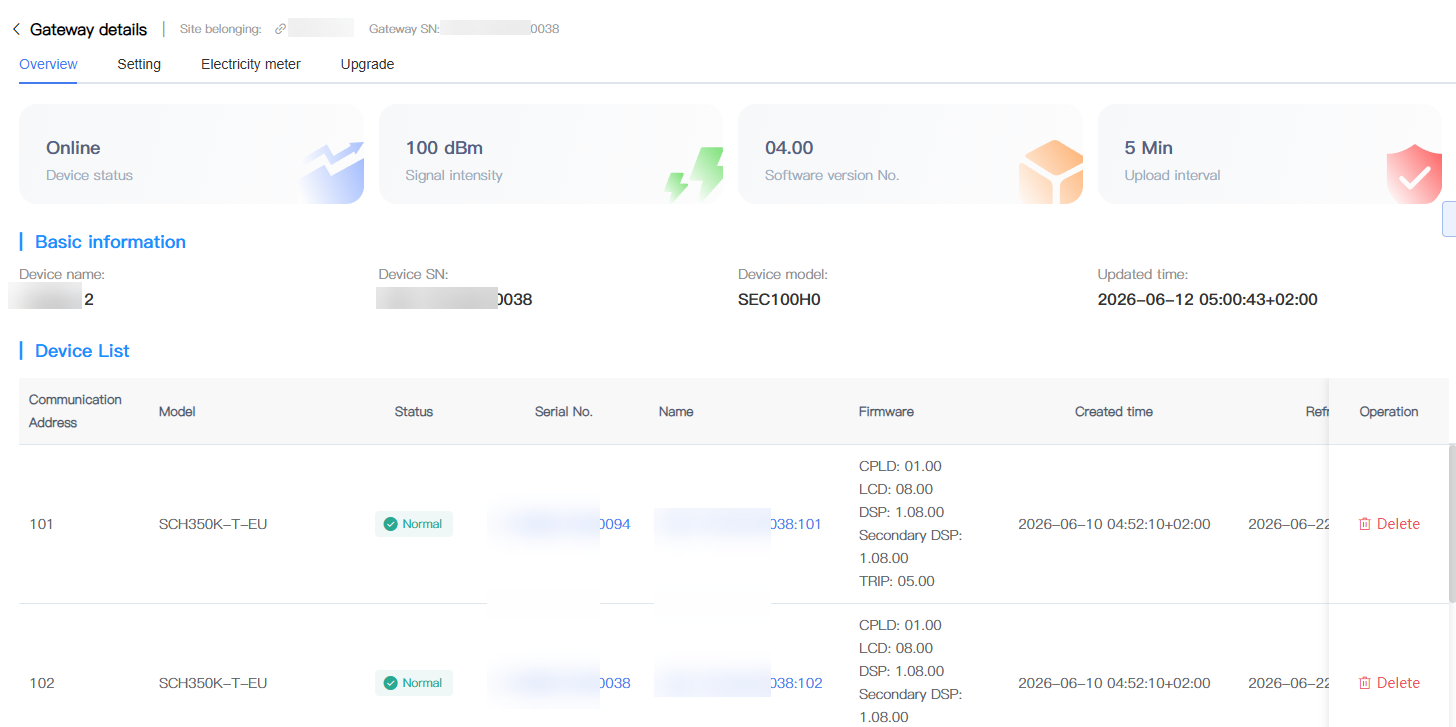
NOTE
The information displayed may vary depending on the Gateway model.
The connected Device list displays the Devices currently communicating with the Gateway.
Settings
The "Settings" tab is used to configure Gateway communication, data upload, Anti-Reflux, and Device management-related parameters.
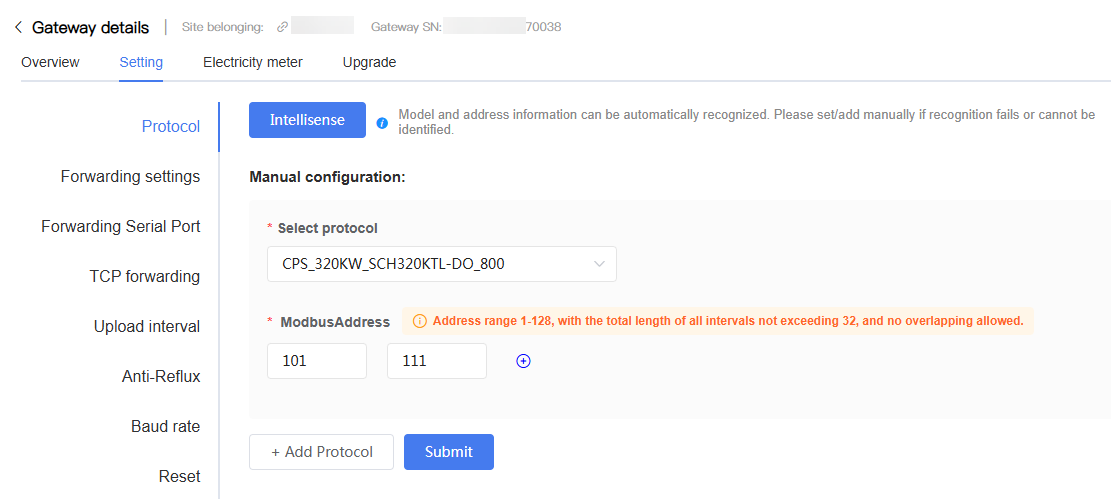
The Settings page includes the following functions:
| Setting | Description |
|---|---|
| Protocol Delivery | Configure Device communication protocol and Modbus address range. |
| Forwarding Settings | Configure the Gateway data forwarding method. |
| Forwarding Serial Port | Configure serial port communication parameters. |
| TCP Forwarding | Configure TCP communication parameters. |
| Upload Interval | Configure the time interval for the Gateway to upload data to the platform. |
| Anti-Reflux | Configure Anti-Reflux-related parameters. This setting is displayed only for multi-Device Anti-Reflux Gateways with Electricity Meter functionality. After configuration, you can view Electricity Meter historical data in the 8.2.4 Electricity Meter tab. |
| Baud Rate | Configure the communication port baud rate. |
| Reset | Remotely restart the Gateway Device. |
NOTE
The configuration items supported may vary depending on the Gateway model.
Some configuration changes require a Gateway restart to take effect.
For parameter descriptions, configuration principles, and recommended setting values, refer to the product documentation for the corresponding Device.
Before modifying communication-related parameters, confirm that the on-site Device communication configuration is consistent with the Gateway settings.
Electricity Meter
The "Electricity Meter" tab is used to view Electricity Meter historical data collected by the Gateway.
This tab is only applicable to multi-Device Anti-Reflux Gateways with Electricity Meter functionality. For Gateway models that do not support Electricity Meter connection, the system does not display the "Electricity Meter" tab.
For Anti-Reflux-related parameter configuration, see 8.2.3 Settings.
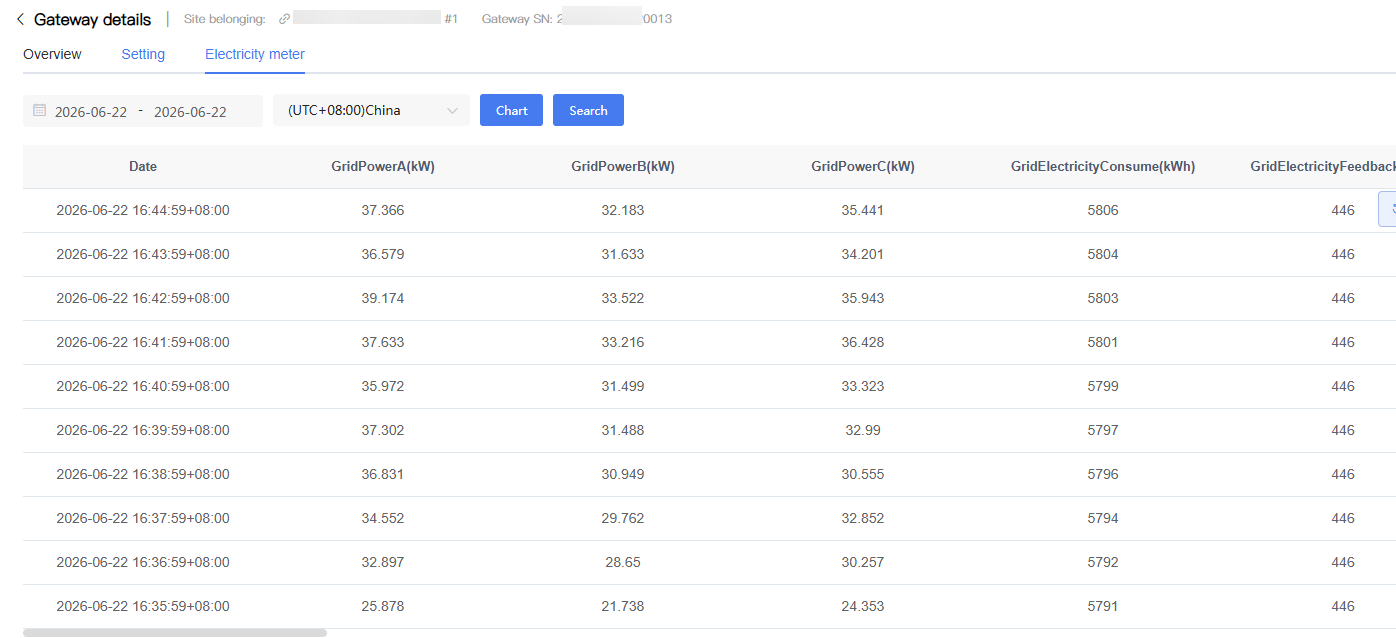
Users can perform the following operations:
Filter historical data by time range.
Select a time zone to view data.
View the Electricity Meter historical data list.
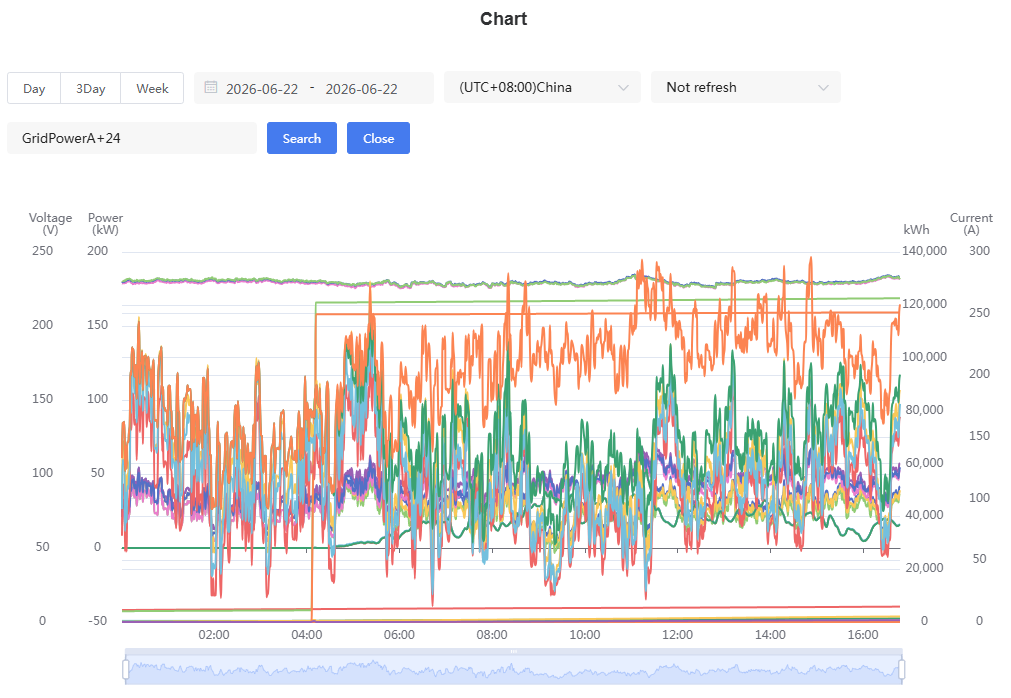
View data change trends through charts.
After clicking "Chart", you can view Electricity Meter historical data in chart form, supporting viewing data change trends by Day, 3 Days, or Week dimensions.

NOTE
Electricity Meter data originates from Electricity Meter Devices connected to the Gateway.
The data content displayed may vary depending on the Gateway model and Electricity Meter model.
Data update time and sampling interval are based on the actual data reported by the Device.
Upgrade
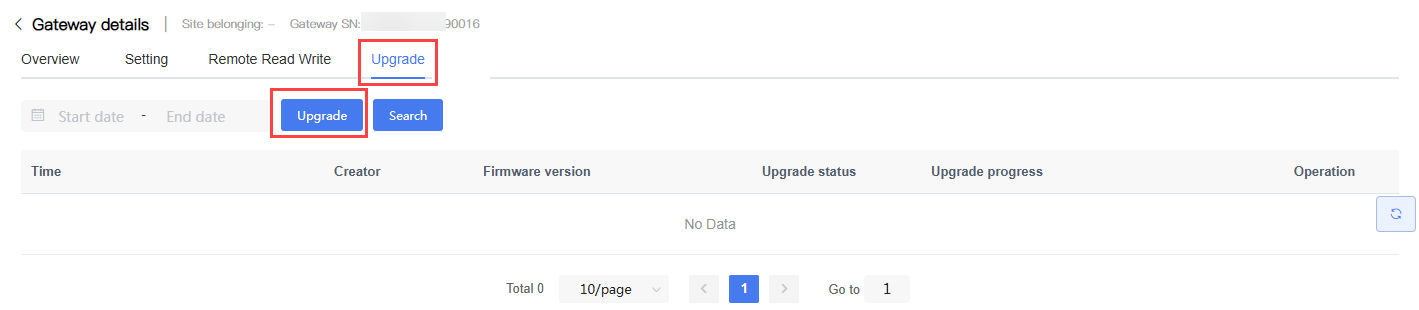
The "Upgrade" tab is used to create Gateway Firmware Upgrade tasks and view Upgrade records and results.
Create Gateway Upgrade Task
Steps:
Enter the Gateway Details page.
Click the "Upgrade" tab.
Click the "Upgrade" button.
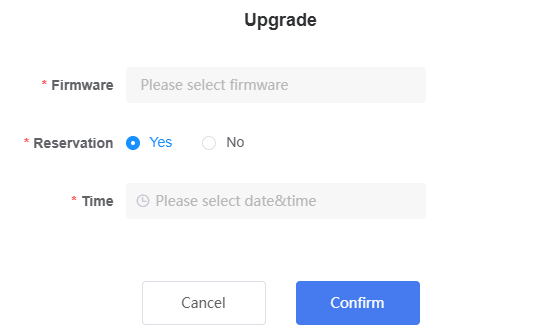
In the Upgrade window that appears, select the target Firmware version.
Choose the upgrade method as needed:
No: Execute the upgrade task immediately.
Yes: Schedule the upgrade task.
If selecting scheduled upgrade, set the scheduled time.
Click "Confirm" to create the upgrade task.
View Gateway Upgrade Records
After the upgrade task is created, you can view the following in the upgrade record list:
Creation time
Creator
Firmware version
Upgrade status
Upgrade progress and execution result
Remote Read/Write (Common Manager Function Only)
"Remote Read/Write" is used to remotely read Device registers, write parameters, send pass-through commands, and obtain Fault Recording data through the Gateway.
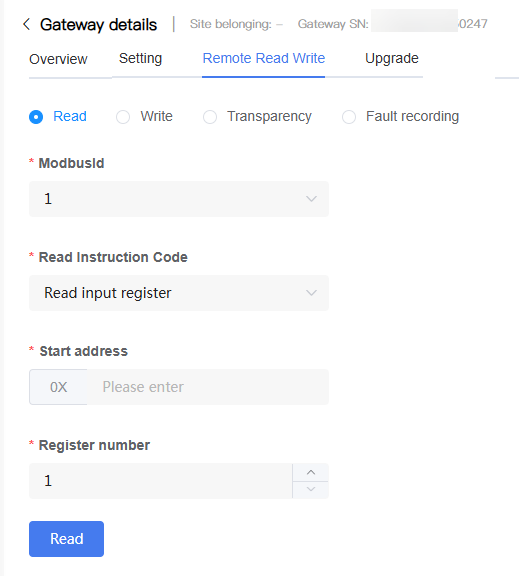
The following operations are supported:
| Function | Description |
|---|---|
| Read | Read Device data based on the specified Modbus ID, function code, and register address. |
| Write | Write data to a specified register to modify Device parameters or execute control commands. |
| Transparency | Send custom Modbus commands and view the Device response. Supports saving frequently used commands for reuse. |
| Fault Recording | Obtain Device Fault Recording data based on the recording index, and support downloading recording files for analysis. |
NOTE
The Remote Read/Write function is typically only available to users with the corresponding permissions.
For register addresses, function codes, and parameter descriptions, refer to the product documentation for the corresponding Device.
Incorrect write operations may cause abnormal Device operation. Please operate with caution.
The Fault Recording function is only applicable to Devices that support the recording function.