User Configuration (Personal Center)
This section guides you on how to maintain your personal profile, personalization preferences, and account security.
On the User Settings page, you can manage your personal user information, account security settings, and basic system display preferences.
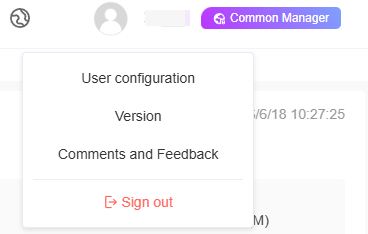
To access the User Configuration page:
Click the profile picture or username in the upper-right corner of the page.
Select "User Settings" from the drop-down menu.
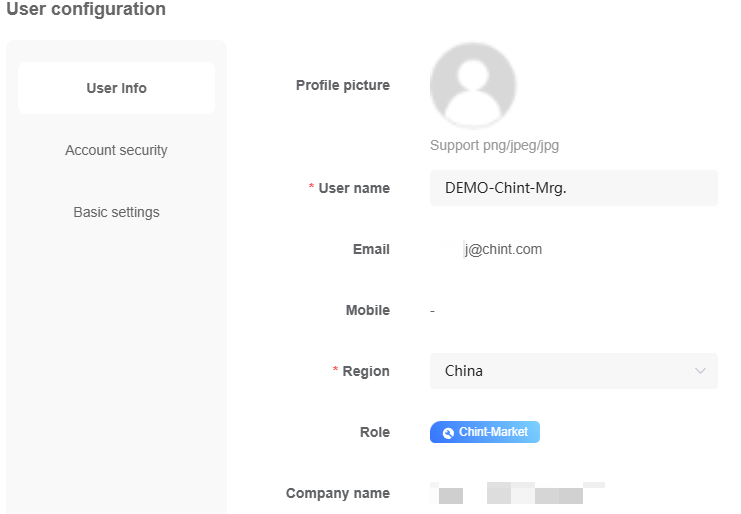
Update User Information
Follow the steps below to update your profile picture, username, region, and other basic information:
In the left navigation bar, click "User Information".
Configure or view the corresponding settings according to the table below:
| Setting | Description |
|---|---|
| Profile Picture | Displays the avatar of the current account. Click the avatar to upload a new image. Note: The system only supports .png, .jpeg, and .jpg formats. |
| Username | Enter your new username (required). |
| Displays the currently bound email address. Note: This field is read-only here. To modify it, go to the "Account Security" page. | |
| Mobile Phone Number | Displays the currently bound mobile phone number. Note: This field applies only to the Asia-Pacific site and is read-only here. To modify it, go to the "Account Security" page. |
| Region | Click the drop-down menu and select your country or region (required). |
| Role | Displays your current system permission role (e.g., Operations Engineer). This field is read-only. |
| Company Name | Displays the name of the Company to which you belong. This field is read-only. |
- Click "Save" to apply the changes.
Account Security Management
Click "Account Security" in the left navigation bar to manage your login credentials or account.
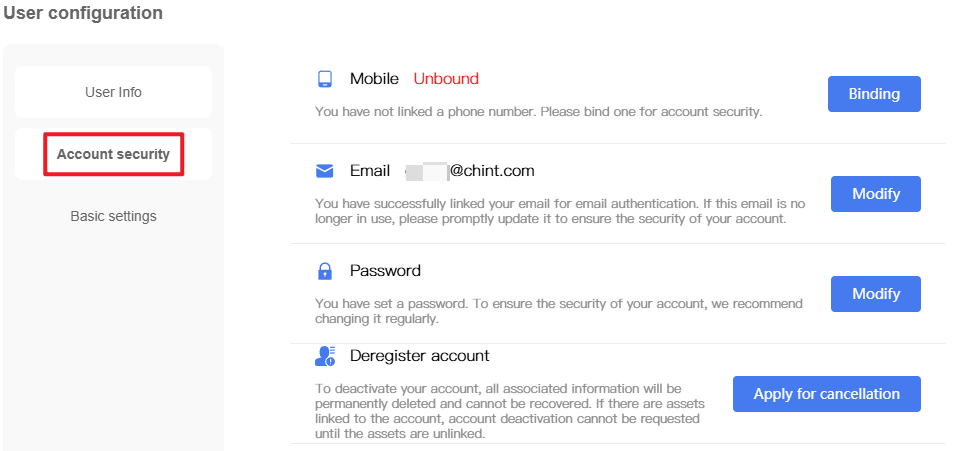
[figure: Account Security]
Bind Mobile Phone Number
Applicable to Asia-Pacific site only.
In the "Mobile Phone Number" field, click "Bind" on the right.
Enter the mobile phone number.
Click "Get Verification Code". After receiving the verification code sent by the system to your mobile phone, enter it in the input field and click "Verify".
Click "OK" to complete binding.
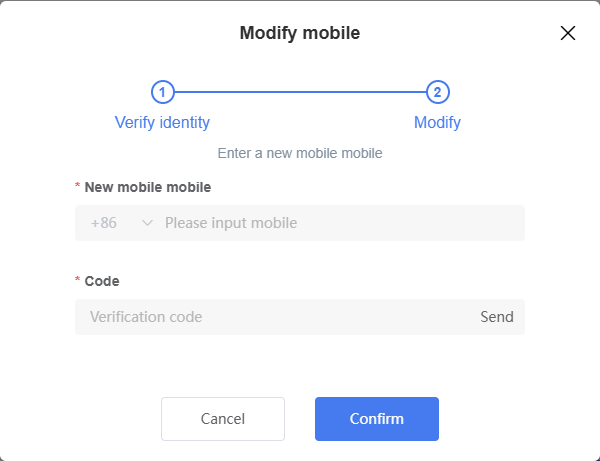
Modify Mobile Phone Number
Applicable to Asia-Pacific site only.
In the "Mobile Phone Number" field, click "Modify" on the right.
Current Mobile Phone Number: Displays the currently bound mobile phone number.
Verification Code: Click "Send". After receiving the verification code sent by the system to your mobile phone, enter it in the input field and click "Verification".
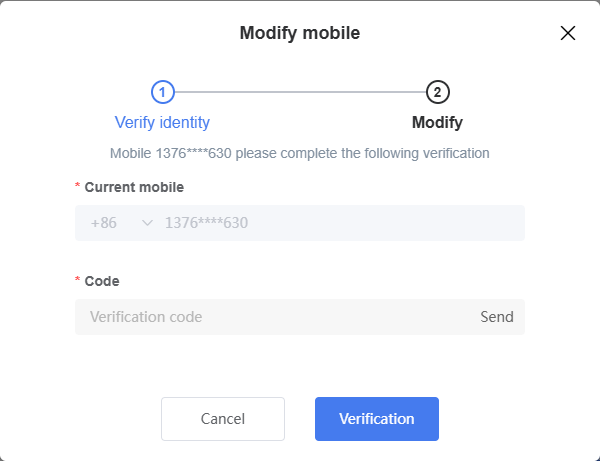
New Mobile Phone Number: Enter the new mobile phone number.
Verification Code: Click "Send". After receiving the verification code sent by the system to the new mobile phone number, enter it in the input field.
Click "Confirm" to complete the modification.
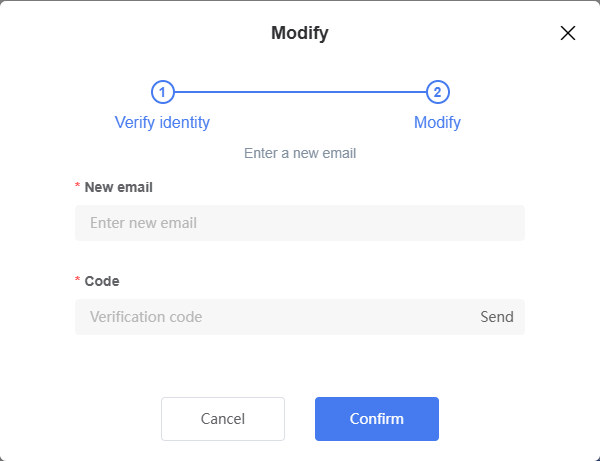
Modify Email
In the "Email" field, click "Modify" on the right.
Current Email: Displays the currently bound email address.
Verification Code: Click "Get Verification Code". After receiving the verification code sent by the system to the email, enter it in the input field and click "Verification".
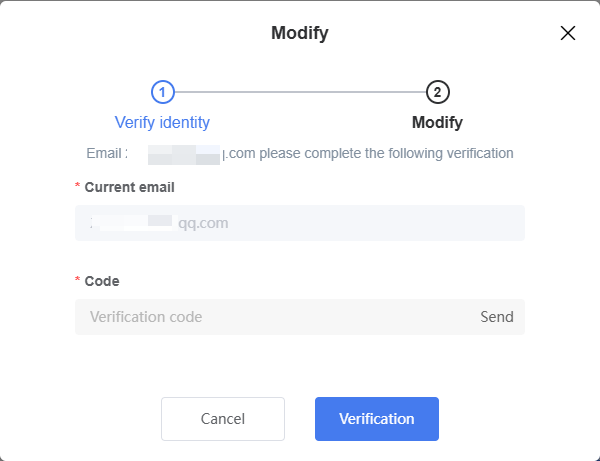
New Email: Enter the new email address.
Verification Code: Click "Send". After receiving the verification code sent by the system to the new email, enter it in the input field.
Click "Confirm" to complete the modification.
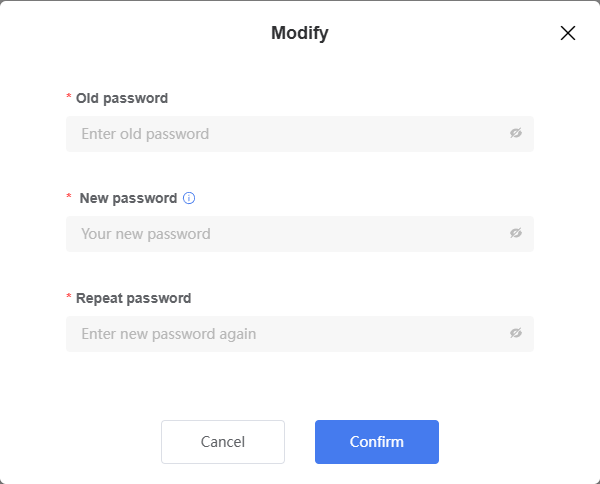
Modify Password
In the "Password" field, click "Modify" on the right.
Old Password: Enter the current password.
New Password: Enter a new password. The password must be 8–18 characters long and contain at least two of the following four character types: uppercase letters, lowercase letters, digits, and special characters.
Confirm Password: Re-enter the new password to ensure it matches the entry in the "New Password" field.
Click "Confirm" to complete the password reset.
💡 Tip: Click the "eye" icon on the right side of the input field to toggle between showing the password in plain text or masked form, for easier verification.
Cancel Account
WARNING
Canceling your account will permanently delete all account-related information and cannot be undone. Please proceed with caution.
Prerequisite: If there are bound Site assets under the account, cancellation cannot be requested. Be sure to unbind or transfer Site assets before applying.
In the "Deregister Account" field, click "Apply for Cancellation" on the right.
Carefully read the Account Cancellation Notice that appears.
Select the confirmation checkbox: "By applying for cancellation, you voluntarily waive all rights within the account and agree to withdraw.
Click "Confirm" to complete account cancellation.
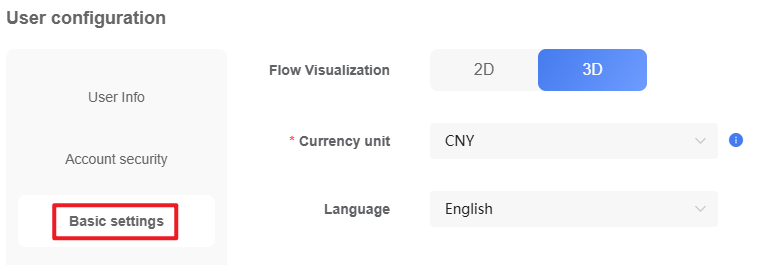
Modify Basic Settings
Follow the steps below to configure your personalized visual effects and localized data preferences:
In the left navigation bar, click "Basic Settings".
Adjust the settings according to the table below:
| Setting | Description and Instructions |
|---|---|
| Flow Diagram Display | Select 2D or 3D to switch the visual presentation style of the system energy flow diagram. |
| Currency Unit | Click the drop-down menu and select your preferred localized currency unit (e.g., USD) (required). Sets the currency unit for Revenue display, used on the Home page and in Reports. |
| Language | Click the drop-down menu to switch the system interface display language. |
- Click "Save" to apply the changes.